
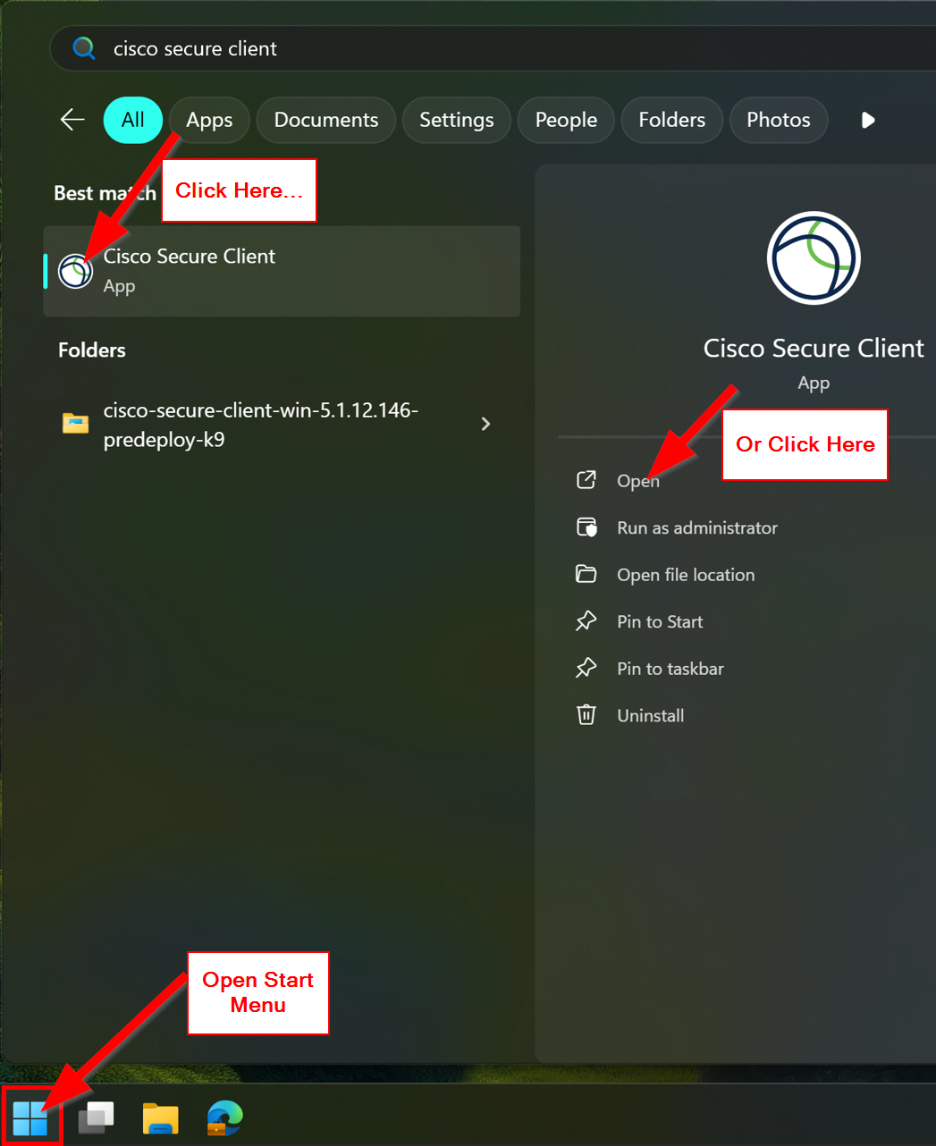
Open Start Menu à search for “Cisco Secure Client” à select app or click “Open”
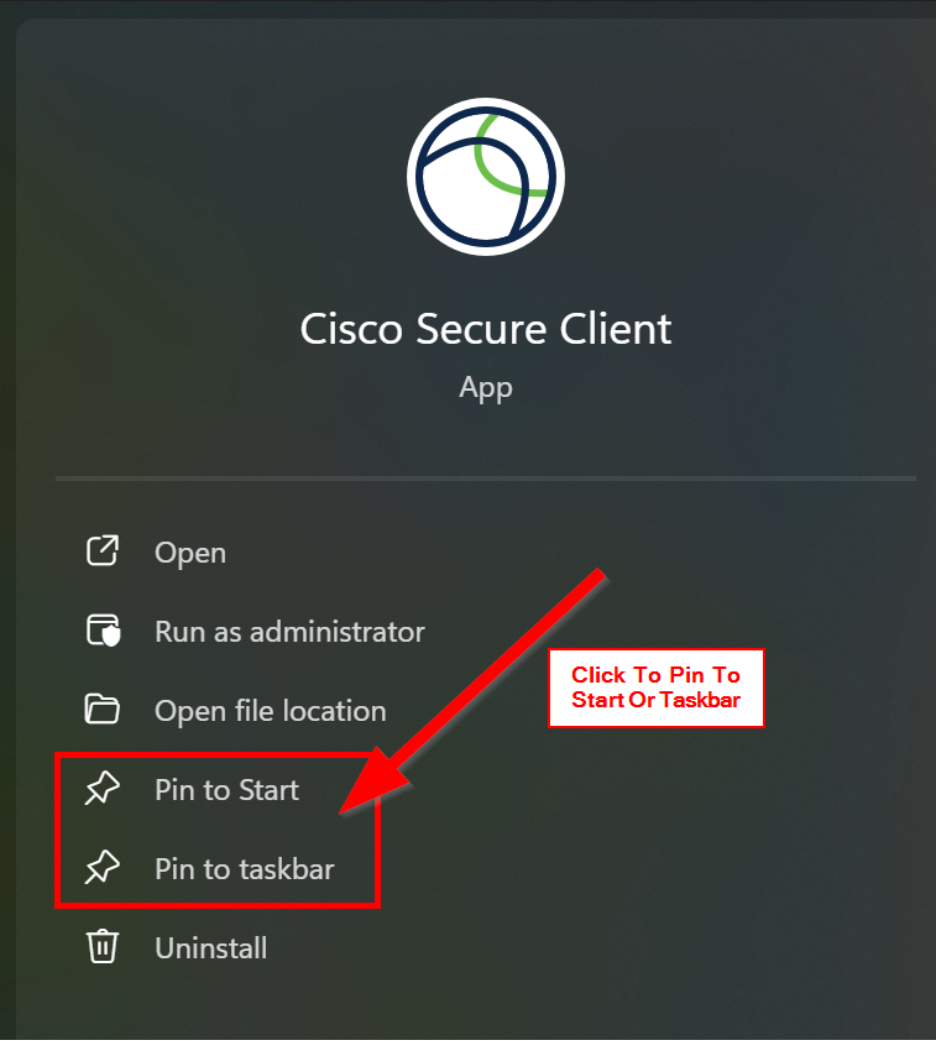
Optionally, before selecting the app, you can choose to pin it to your Start Menu or your Taskbar
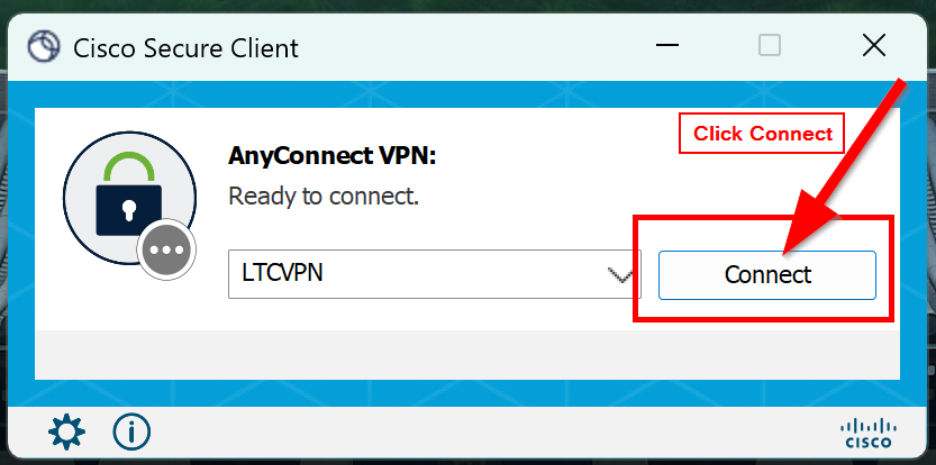
Once the Cisco Secure Client app opens à Click “Connect”
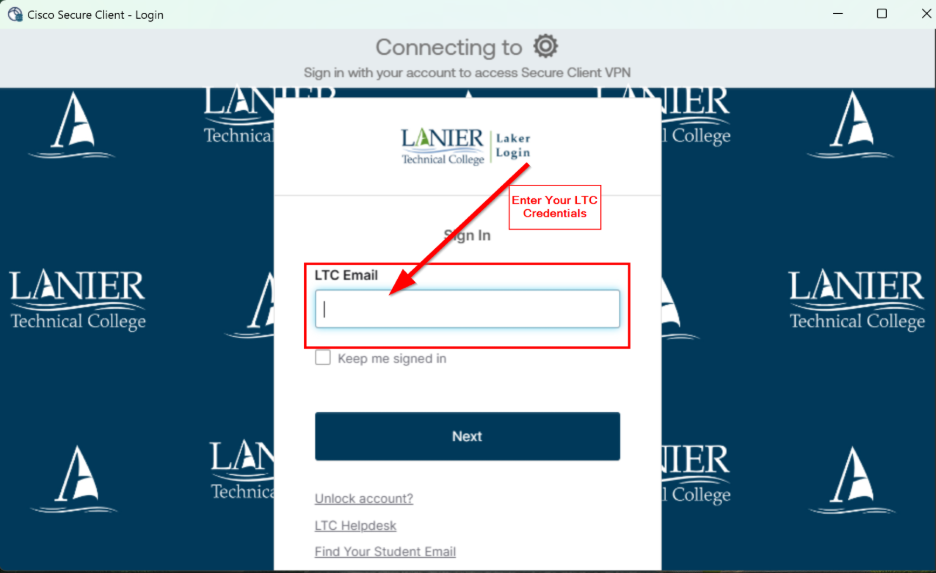
At the Okta login prompt, enter your LTC email address and password
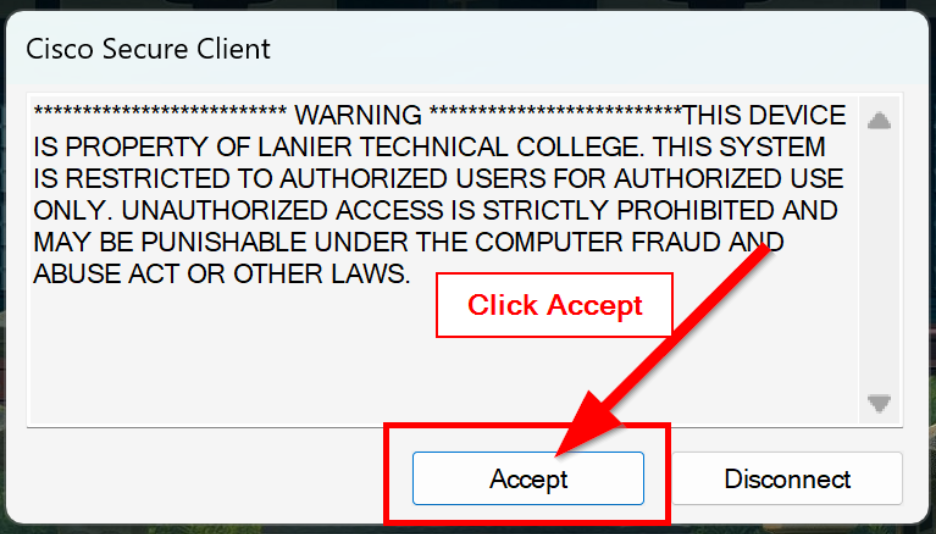
Click “Accept” on the LTC warning message
After authentication, you should see a Cisco Secure Client icon in the lower-right of your taskbar
The padlock confirms that you have successfully connected to the new LTC VPN
Please note that upon first connecting, the padlock may appear and then disappear for a few seconds as the VPN works to stabilize your connection. It should take less than 30 seconds for the padlock icon to reappear and remain

To disconnect the Cisco Secure Client VPN you can either:
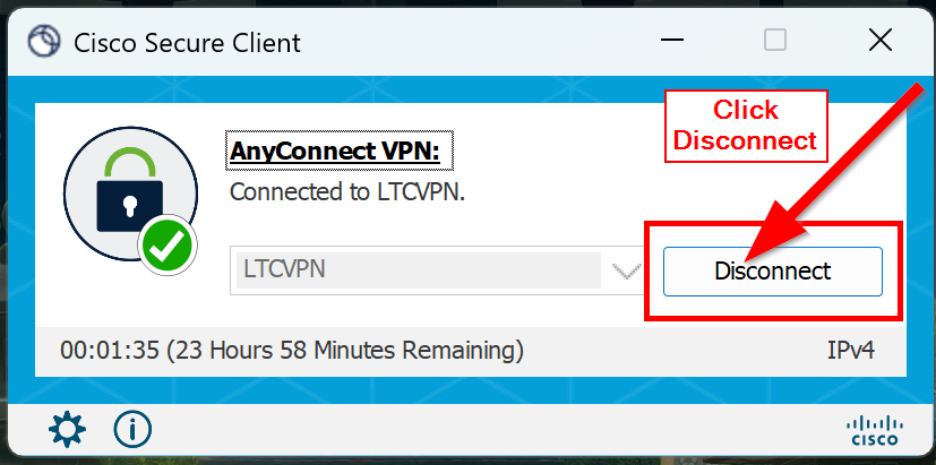
1) Click the taskbar icon in the lower-right of your taskbar tray à Wait for the Cisco Secure Client window to open à Click “Disconnect”
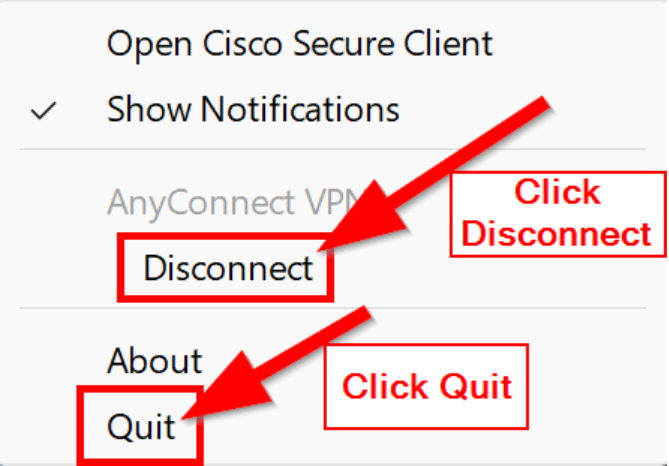
Or 2) right-click the taskbar icon in the lower-right of your taskbar tray à Click “Disconnect” or Click “Quit”
***Note***